Tuesday, May 26, 2015

How to Install NVIDIA Video Card Drivers for Ubuntu/Kubuntu Install or Kernel Upgrade

I have a nice new Linux computer I got from ZaReason this past Christmas, and I decided to install Kubuntu (KDE + Ubuntu) in order to more nearly match my (really slick) XPS 13 Sputnik system from Dell, which comes pre-installed with Ubuntu.  I had previously used Fedora 20 on my desktop computer, but wanted to keep the OS on both computers more in sync, and Ubuntu also has better integration with sound, video, peripherals, and other desktop (i.e. non-server) hardware concerns.

The problem is that my nice new EVGA brand video card (with NVIDIA GPU) is not natively supported by Linux, so you have to download and install the drivers from the NVIDIA website. A current driver as of this writing can be found at http://www.nvidia.com/object/unix.html (it might be easier to google "nvidia linux driver download" than to directly navigate the NVIDIA website).  Look under the "Linux x86_64" category.  I always choose the "Latest Short Lived Branch" since it will have the most bug fixes (e.g. Latest Short Lived Branch version: 349.16).  Download this file to your computer, the do a power-off restart.

The power-off part here is important. In configuring the video card, we have a fundamental conflict between the motherboard's built-in video output and the "non-standard" video card output.  When you perform a fresh Linux install or upgrade the OS kernel, you are starting from ground zero and the video card will no longer work.  Unfortunately, the Ubuntu software update system seems to come up with a semi-major patch every month or two which requires the re-installation of the video drivers. While I could avoid the problem by refusing to perform software updates, I am always eager to get bug fixes and new features in all my other packages, and I just try to minimize the inconvenience of re-installing the video card driver on the new OS kernel.

The problem is that, when the video card quits working, you can't tell what is going on, much less fix it!  The following steps are the fastest way I've found to get around these difficulties.

My video card has three (yes, count 'em, three!) video outputs, and I have become addicted to using all three monitors.  Yes, I know, it might seem excessive, but trust me:  once you've tried three monitors, you'll never (voluntarily) go back to dual monitors again.  Of course, the motherboard built-in video output makes it four video output ports in total.

Most monitors (I prefer the excellent 27 inch LG IPS 27MP65) have at least 2 inputs, both HDMI and VGA.  The trick is to use all three HDMI outputs from the NVIDIA video card to the three HDMI monitor inputs, and also connect a VGA cable from the motherboard built-in video output to one of the monitors (preferably the least-used monitor as the NVIDIA card sees it).

If only one video input is active, your monitor should normally be able to switch to the active input (HDMI or VGA) port automatically (especially when the monitor powers up).  If this sometimes fails, there should be a button labled "Input" or similar that will allow you to manually switch to the desired video input port.  Remember this, in case the monitor is displaying the VGA input and what you need to see is on the HDMI input, or vice versa.  If you find this problem is occurring, move the VGA cable to a monitor that is not trying to display HDMI.  It is much easier if you can see all active inputs simultaneously on different monitors.

When you first install Linux (or after a kernel upgrade), the new kernel will not find the drivers for the NVIDIA video card and the built-in video output will be used.  The monitor connected to the built-in VGA output should show the single-monitor display, and you'll be able to install Linux and boot up. At this point, you need to learn a few tricks.

The first trick is knowing that the NVIDIA driver cannot be installed when Linux is in the normal multi-user mode with the graphical X-Windows display active.  You must boot into a single-user, text-only mode before installing the driver.  On Kubuntu (my favorite) or plain Ubuntu this requires a power-off restart.

When booting, the GRUB bootloader will give you a 10-12 second countdown allowing you to select boot options before it attempts to auto-boot the newest kernel.  One of the options is to type the letter "e" in order to Edit the boot options.  This is what we need.  Type the "e" before the countdown timer expires.

At this point, you should see a screen such as this one:


The important part is in the lower-right-hand corner, where you can see the words "quiet splash" near the end of the next-to-the-last line.  The "quiet" part means that status messages to the console during boot are suppressed.  The "splash" part means that the OS boots into the multi-user, graphical X-Windows mode.  Both of these must be disabled in order to install the NVIDIA video driver.

Using the arrow keys, maneuver to the "quite splash" words, then use the Backspace or Delete key to remove the offending words and replace them with the single word "text".  When you are done, the screen should appear like this:


You may now follow the instructions at the bottom of the screen to continue the boot with your modified boot params (e.g. Crtl-X). You should see boot status/progress messages scrolling past on your VGA-port connected monitor.  Upon successful boot, the VGA-port monitor will look like this:
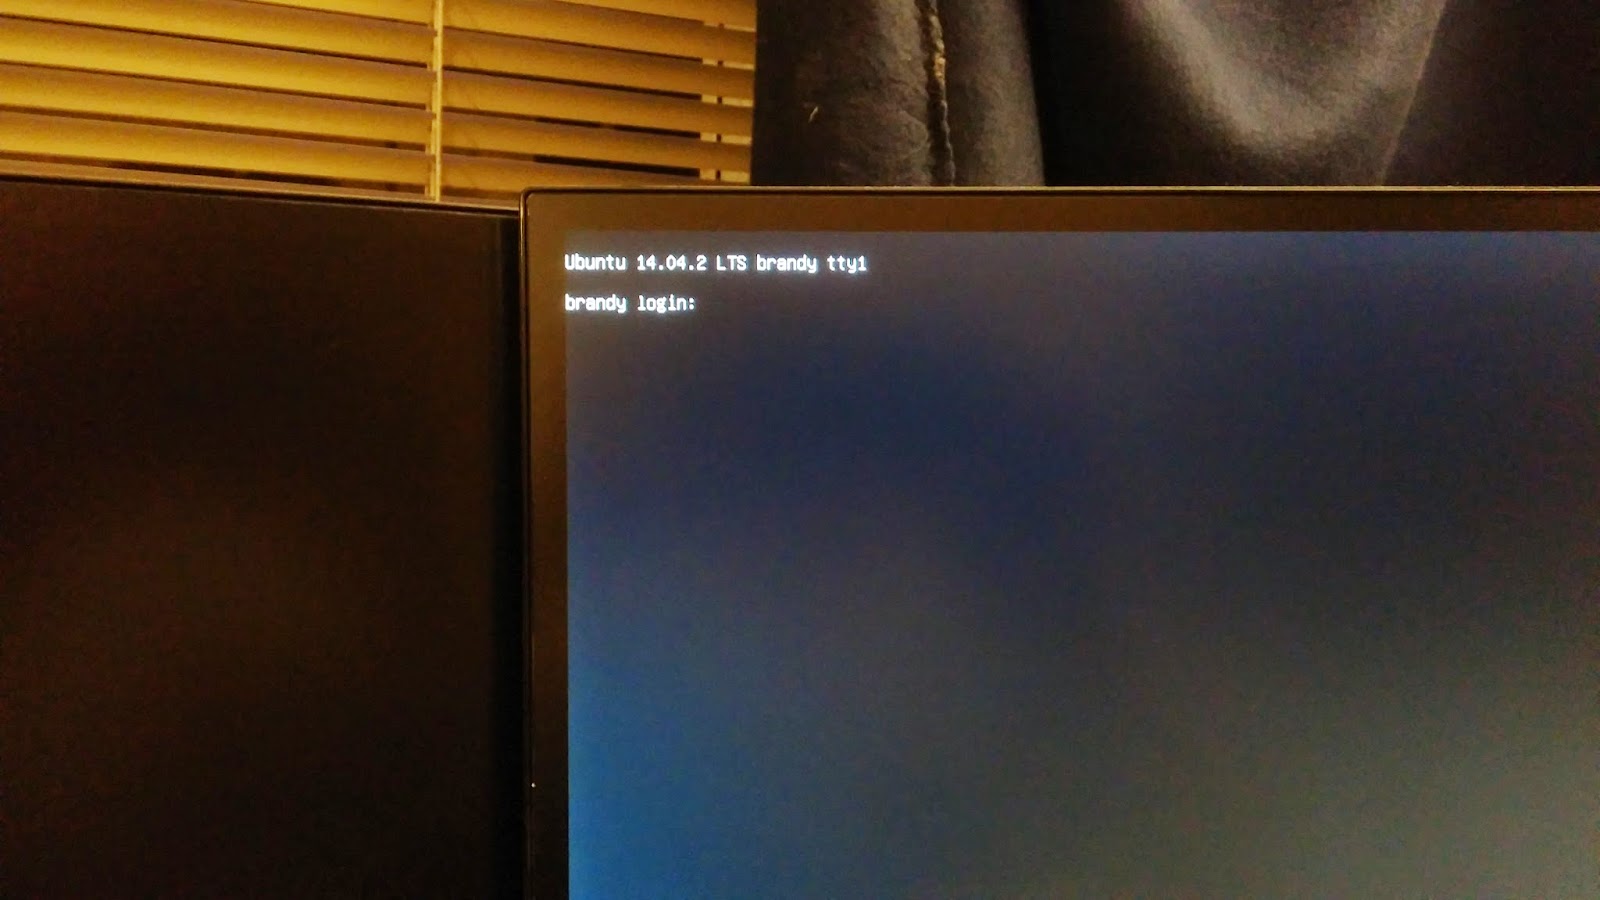

Voila!  You have booted into single-user text mode.  Go ahead & login and navigate to the directory containing the new video driver (typically ~/Downloads).

In this screen shot, you can see that I have three NVIDIA drivers downloaded (I keep forgetting to delete the older two).  Note that I don't always download the absolute most recent driver for each OS kernel update (maybe 2-3 times/year I'll download the latest driver from the NVIDIA website). Pick the newest (or only) driver you have, and invoke it as shown with "sudo bash NVIDIA-xxxxyyyyzzz.run":


While the driver is a shell script, I find it easier to invoke it using bash rather than change permissions and invoke it directly.  You need the "sudo" part since the video driver installation script must run with root permissions.  At this point, the driver will use "ASCII graphics" to complete the installation process.  It will stop about a half-dozen times to ask your permission for things.  Use the arrow keys to highlight the "Yes" answer, then hit <return> to invoke your selection.  Keep doing this until the installation is complete.

At the end of the installation, your VGA screen will be blank, and you'll be back at the command prompt.  Here, we need another power-off reboot.  Using "sudo poweroff" is a quick & easy way to do that.


Once the system has powered-off, hit the power button and begin a normal boot.  After the GRUB timer countdown, you will likely see an "Ubuntu" splash screen for a few seconds on the VGA output.  At this time, the computer should recognize your new video driver and switch to the three HDMI outputs of the video card and complete the boot process.  The VGA output will be unused from here on.

If your monitor is like mine, it may be confused by having VGA input that is active for 5-10 seconds, but then dies.  It keeps looking for the VGA input to come back and does not switch over the the (now active) HDMI input.  You can either use the monitor's Input switch to manually switch over to the HDMI input, or perform a quick power-cycle which should cause it to recognize the active HDMI input and ignore the inactive VGA input.

That's all, folks!  Happy Linuxing!

Alan Thompson

P.S.  For some cool stuff that you wish was in Clojure, you may wish to visit:  https://github.com/cloojure/cooljure     :)  

Saturday, January 3, 2015

Configuration of the LG 27MP65 (aka 27MP65HQ or 27MP65HQ-P) monitor


Configuration of the LG 27MP65 (aka 27MP65HQ or 27MP65HQ-P) monitor

I just purchased an LG 27MP65 monitor and noticed the text quality in the editor didn't seem to match up against a previous, similar LG monitor. As the new monitor was a bit higher grade, this was most surprising.

There are many menu settings that allow customization of the display.  After reading the LG manual (http://www.lg.com/us/support-product/lg-27MP65HQ-P) & playing around with them these are the best settings I've found for software development (e.g. lots of text viewing in editors).

- Turn on the monitor to start.

- Press MENU button.
  - Press DOWN button (i.e. button under downward triangle) until RESET is highlighted.
    - Press RIGHT button (i.e. button under rightward triangle) once. This will reset all
      settings to factory default (good starting point).

- Press MENU button (left-most button)
  - Press DOWN button until NEXT-MENU is highlighted. Press RIGHT button.
    - The first sub-menu is PICTURE (already selected)
      - Leave SHARPNESS at the default 5.  Lower values blur text, while higher values
        just wash it out by adding white to colors.
      - BLACK LEVEL should already be at HIGH - leave alone.
      - Always leave OVERSCAN at OFF
      - Press the "return" button (left-then-up arrow) to return to "top" menu.
  - Press RIGHT button to select COLOR. Press DOWN to select COLOR RESET on 2nd page.
    Press RIGHT to perform color reset.  Since you just did a "master" reset this should
    really be unnecessary.
      - Press the "return" button (left-then-up arrow) to return to "top" menu.
  - The remaining 3 top-level items can be ignored. Select the EXIT option.

- Just for fun, press the READER button (2nd from left).  There are 3 levels: 1, 2, OFF.
  Make sure OFF is selected it should be already).
  - Reader mode is used for e-books, etc and is not good for editing software.
  - The READER menu will disappear after a few seconds

- Press FUNCTION button (3rd from left).
  - The first sub-menu is SUPER ENERGY SAVING (already selected)
    - Press DOWN, then RIGHT to set SUPER ENERGY SAVING to OFF.
    - Press the "return" button (left-then-up arrow) to return to "top" menu.
  - Press RIGHT to select PICTURE MODE
    - Press DOWN to select PC/AV Mode. 
      - Press RIGHT until it says PC
    - Press DOWN again to the rows of modes
      - Press RIGHT to select a mode.  I have found that either TEXT or CINEMA looks best
        for GVim and GMail. Since CINEMA gives slightly better colors for
          syntax-highlighted text, that is my favorite. Your milage may vary....
      - Press the "return" button (left-then-up arrow) to return to "top" menu.
  - Press RIGHT to select SUPER RESOLUTION
    - Leave it at OFF.  Increasing this value seems to add white to all colors, simply
      making them brighter
  - The remaining 2 modes have no effect

- If you are using the DSUB (analog VGA cable) input connection, press the AUTO button
  (4th from left).  This will perform auto-tuning for the analog VGA input signal.
  - You may be happiest using an HDMI input source since it is digital
  - NOTE: Since HDMI is digital, ANY cable is just as good as any other.  It will either
    work perfectly or you will get no signal at all.  So PLEASE, don't spend $100+ on HDMI
    cables.  The $5 cables on sale are just as good.

- Just for fun, press the INPUT button (right-most button).  The display will blink
  momentarily, then verify the input source (e.g. HDMI).

- Note that the first item under the MENU button is the brightness.  If you read a lot of
  text that is black on a white background (e.g. GMail & similar), you may wish to reduce
  the brightness to 70% or some other comfortable value.
  - Don't forget that this control is still available if you need to reset the BRIGHTNESS
    to 100% for do more intense work (photo editing, watching videos, etc).

Wednesday, August 27, 2014

Canon Pixma MX922 Scanner - Fedora 20 Linux install


Summary:
  1. Get the Linux drivers from the Canon site
  2. Choose *.rpm.tar.gz format
  3. Untar:   tar-xzf  rpm.tar.gz

Drivers:  You must visit the Canon-Europe site:  http://www.canon-europe.com/Support/Consumer_Products/products/Fax__Multifunctionals/InkJet/PIXMA_MX_series/MX924.aspx?type=download&language=EN&os=Linux

Download 2 RPM tarballs for use on Fedora

Installation:  TBD

This blog:  http://www.ernielevesque.net/its-scangearmp-using-canons-mutli-function-printer-scan-utility-with-linux/

points out that you need to use the command-line util "scangearmp" to invoke Canon's linux scanner utility.  I can only assume that "Scan Gear MP" implies "multiple pages"(?).  Anyway, the name is not documented anywhere I can find....thank god for this blog and the internet!

Connection:  I am just using the USB connection for now; no wireless features enabled yet.

Alternative:  I have used VueScan in the past and it worked well (http://www.hamrick.com/).  I will later evaluate this as an alternative to the Canon scangearmp utility.

----------------------------------------------------------------------------------------
Original post:  

ernie levesque's clues

 travel, software and more


it’s scangearmp ! using canon’s mutli-function printer scan utility with linux

I bought a Canon Mx-922 “all-in-one” printer, scanner, fax. copier.  I was hoping to use is a printer and an occasional copier but I also wanted to use it to rid myself of the last vestiges of my filed papers.  Some of my papers have to be kept as originals, of course.  I have to keep deeds and titles but a lot of what I have I mostly likely will never need for anything except maybe a reminder.  These papers have no legal value as originals.  That was the plan but it ran into some problems at the outset.
The printer itself is easy to set up.  It is wireless and you can set it up with WPS or with a pass phrase.  You could also set it up with a Ethernet connection.  I have a router that allows me to connect a printer but I chose the WPS option and the three computers on my network were installed and working in minutes.  I should mention that all if these computers are Linux or Android based.
The scanner was an entirely different story.  I expected that the scanner would work like my canon scanner.  I bought the canon scanner years ago.  It is a single page flat bed scanner and it was plug and play ready the first time I used it.  Xsane recognized the scanner over USB immediately.  I expected that this new device would work similarly but it did not.  I connected it directly to one computer using the USB port but it did not recognize the device.
I was able to find out with some research that Canon had a utility called Scangear.  I went to their website but I could not find any Linux software available for the MX-922.  A little more research led me to the Canon European site.  The utility is located here:
http://www.canon-europe.com/Support/Consumer_Products/products/Fax__Multifunctionals/InkJet/PIXMA_MX_series/MX924.aspx?type=download&page=1
You’ll notice that the device is MX-924 not MX-922 in the URL but the software is for the 920 series.  To get the actual download you have to select the download tab and then the operating system (Linux) and the language (English).  The offer the complete source library if you want to make your own options but I selected the Debian package.
The package unzips to include an “install.sh” file.  I opened a terminal window and went to the directory containing the file and ran it (./install.sh).  Everything worked just fine but my computer still did not recognise the scanner.  I was very frustrated at this point and I gave up for a day.
On the following day I searched for new information but this time I only looked for the name scangear.  I did not reference my printer or Linux.  I came across one page where the writer spelled out that scangear is not just a set of drivers, it is also a scan tool and that tool is called “scangearmp”.  I gingerly typed the name into a terminal window and was greeted by a info window that said there was no scanner.  I couldn’t believe it!  Then I noticed that I could “scan” again for scanners.  I did this and it found my scanner and poped up a full fledged scanning tool.  I was estatic!
Now I’m able to scan multiple pages, on both side, from my computer.  The tray hold between 20 and thirty pages and the finished product is a PDF file.  All and all it is very useful tool.  Why couldn’t they just call it “scangear”?  I know that the “mp” at the end probably means “multi-function” but why not just use the name used to document the tool?  And, why not put Linux based software on the US site?  Why make me find it on the European site?

| JULY 25TH, 2013 | POSTED IN HARDWARESOFTWARE |